How Do I Take Long Exposures With My Camera?What you need to know in order to take long exposures greater than 30 seconds with a Canon DSLR, "bulb" mode and a shutter release cable.
This guide is written for Canon DSLR cameras, however, the tips and techniques should be the same for any camera manufacturer. The naming or position of buttons may change so you might have to consult the user guide.
Some of the most popular Canon DSLRs used for astrophotography are the 10D, 300D, 20D and 350D. Under manual control they allow you to set exposures from 1/4000s (1/8000s for the Canon 20D) to 30s. The setting beyond the 30s is "bulb", a term left over from the days when a squeeze bulb was used to mechanically activate camera shutters.
Using Shutter Release for Long Exposures
Modern DSLR shutters are triggered by closing a connection with a remote switch. The form this switch takes varies in complexity and price. The 300D and 350D models are budget versions of the 10D and 20D models. As such, there are a few variations in their design. One variation affects the remote connection port at the base of the camera. The 10D and 20D models present a proprietary N3 socket, while the 300D and 350D have a standard 2.5mm jack socket. This means that a remote switch suitable for one camera will not necessarily be suitable for another.
There are various remote switches available including the RS-80N3 for 1OD and 20D and the RS-6OE3 for APS-C models like the 3OOD and 350D. Simply connect the remote to the camera, set the camera to manual or bulb mode, and then press and hold the remote button to keep the shutter open.
More sophisticated control is possible with the TC-80N3 intervalometer. This can be programmed for a pre-exposure delay, exposure length, delay between exposures, and the number of exposures.

As well as using a remote shutter switch, you can also control the camera's shutter via a PC or mobile phone using suitable software. However, these methods only permit exposures up to 30 seconds. While they are useful for remotely operating the shutter to reduce vibration, they cannot be used for bulb-mode photography.
If you don't want the expense of a Canon shutter release, there are several aftermarket manufacturers which produce quality intervalometers which can be programmed for bulb mode or continuous drives. These can be had for as little as £20 from most photography retailers.
How to Use an Intervalometer for Long Exposures
The exact method for programming an Intervalometer will depend on the model, however, the basic usage is the same.

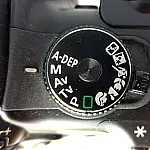
First, you need to set your camera to manual mode and select bulb exposure. On Canon's, simply use the shutter speed selection wheel to increase the shutter speed to 30" and then once more until "B" is shown.
For simple bulb mode operation, there is usually a shutter button on the release, sometimes with a lock. Simply press the button and slide the lock into place. When you're done with the exposure unlock to release the shutter.
Programming an intervalometer to control delay, number of exposures and timed exposures greater than 30 seconds, requires a few settings to be made.
First, you need to press the SET button and find the DELAY option. Set this to the time to wait before taking the first shot. This is like the self-timer mode on the camera but can be longer than most cameras allow. This is useful if you need to press the shutter and run around to be in a group photo for example.
The LONG option is where you set the shutter speed for long exposures and INTVL (or interval) is where you set the time between shots for a continuous shooting. N or NUM is where you set the number of photos to take.
When these values are set, you can press the shutter button to start the timer and start taking long exposures.
Long Exposures and Noise (Grain)
As exposure times increase so does noise. Noise is similar to film grain and increases as exposure increases or ISO increases. Check the article below to see how to reduce and correct noise introduced by high ISO or long exposures.
How Long An Exposure For Star Trails?
A long exposure will render stars as a mass of densely packed lines, as the Earth rotates on its axis. Having a static feature in the foreground helps in the composition with the movement of the stars in the background. Branches and leaves are usually not a good choice unless the wind is calm otherwise they will blur. The calculator in the article below will work out the minimum exposure needed to capture star trails given the objects declination and lens focal length.


